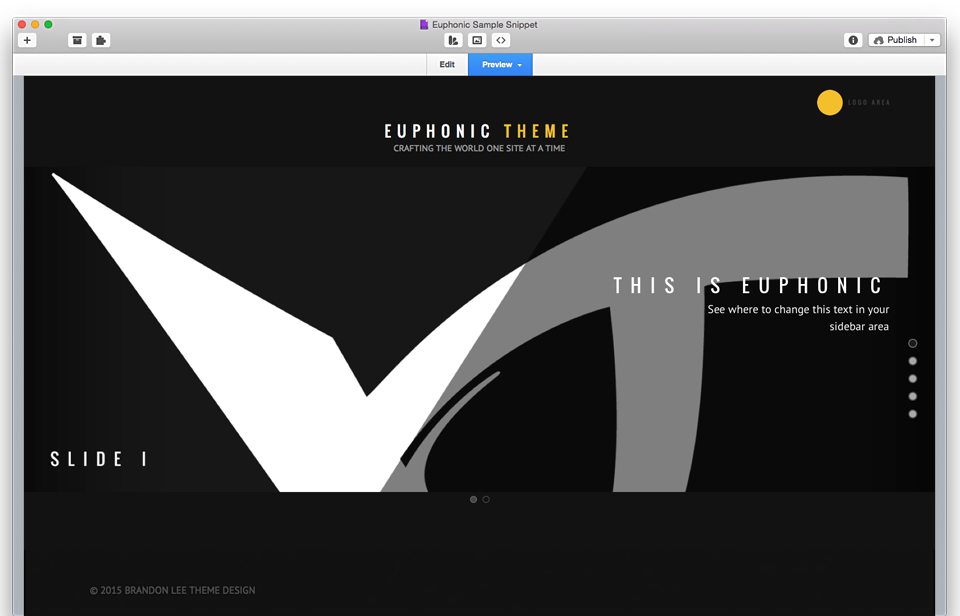
EUPHONIC THEME
CRAFTING THE WORLD ONE SITE AT A TIME
Extra Content Based
Euphonic is a simple and easy to use theme to create fullscreen scrolling websites (also known as single page websites) with up to 11 different slide areas. It allows the creation of fullscreen scrolling websites by utilizing Extra Content areas within a single page giving your guests a unique and enhanced experience when engaging with your content.
Welcome to the Sample Snippet Project
Get started with Euphonic’s included RW 6 Sample Snippet Project so you can follow along in real time with some of the theme’s features already implemented. This great value will give you the ability to compare your inputted snippets in your projects and allow you to quickly copy and paste for future reference.
Full Screen Background
This is an example of a fullscreen background image. Sroll/navigate below to see the tutorials on how to implement some more advanced features throughout your Euphonic project.
Tutorials How To’s
Here are some tutorials to help you make the most of your Euphonic project. Follow along below and explore the page inspector to see where some of the snippets have been applied.
Creating Content Areas/Slides
* The following example shows a project containing 5 content/slide areas. You should see 5 navigation buttons displayed on the right side of your project.
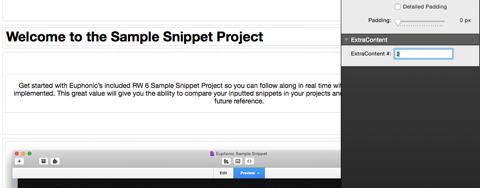
2. Drag and drop your Extra Content Stack into edit mode.
3. Designate the area by number in the Extra Content Stack (Figure 2)
* The following example shows how an Extra Content Stack is designated to area 2. As a result the content will display in the second slide.
4. Enjoy the content creation process and see how your content matches the slides you associate your stacks with.
Figure 1:
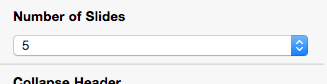
Figure 2:
Full Page Background Image
1. Create a full screen banner image. The following example uses the file name, “banner.jpg”
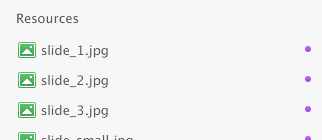
2. Move the image to your Resources area. (Figure 1)
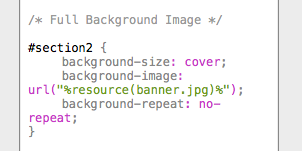
3. Open your page inspector. Insert the following snippet in your custom CSS area. (Figure 2)
* banner.jpg is the name of the image file being used.
/* Full Background Image */
#section2 { background-size: cover; background-repeat: no-repeat; background-image: url("resources/banner.jpg");}Figure 1:
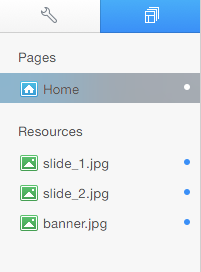
Figure 2:
Responsive Slideshow
1. Before dragging your image to the RW Resources area, you may rename the image after one of the following to assist in keeping your project organized:
* Remember that the rendering of your image is very precise, so naming your image with a lowercase ".jpg" is paramount.
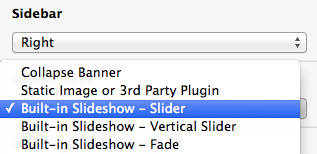
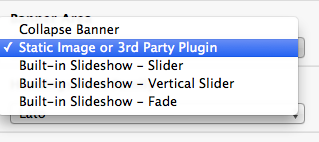
2. Open your page inspector and locate the Banner Area option.
3. Simply select the Built-in Slideshow - Slider option for a sliding effect, or the Built-in Slideshow Fade option for a fading effect.
Figure 1
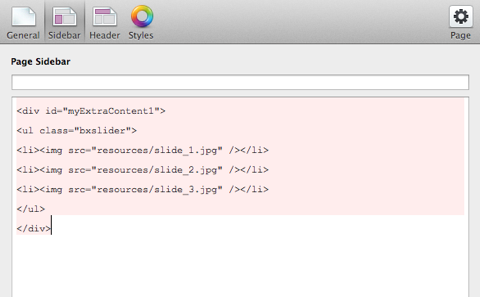
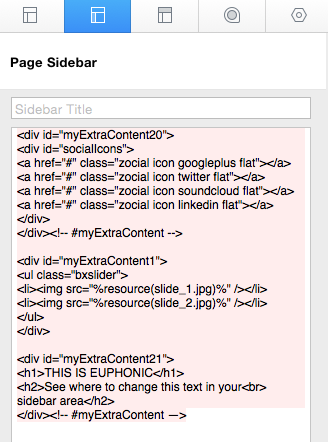
4. Locate the Sidebar area and paste the following HTML so that the images display in the Extra Content 1/Banner area:
<div id="myExtraContent1">

	<ul class="bxslider">

		<li><img src="%resource(slide_1.jpg)%" /></li>

		<li><img src="%resource(slide_2.jpg)%" /></li>

		<li><img src="%resource(slide_3.jpg)%" /></li>

	</ul>

</div>
If you would like to add more than three images (or less), simply add another list item following the pattern seen above etc. The following example showcases how 8 images may be displayed within one on your project page's slideshows:
<div id="myExtraContent1">
<ul class="bxslider">
<li><img src="%resource(slide_1.jpg)%" /></li>
<li><img src="%resource(slide_2.jpg)%" /></li>
<li><img src="%resource(slide_3.jpg)%" /></li>
<li><img src="%resource(slide_4.jpg)%" /></li>
<li><img src="%resource(slide_5.jpg)%" /></li>
<li><img src="%resource(slide_6.jpg)%" /></li>
<li><img src="%resource(slide_7.jpg)%" /></li>
<li><img src="%resource(slide_8.jpg)%" /></li>
</ul>
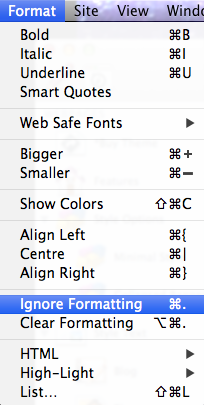
</div>5. IMPORTANT: Highlight the following HTML snippet in your sidebar and click the Ignore Formatting option found in the Format area of the RapidWeaver software. The code will turn light pink when performed correctly.
6. Preview your page and enjoy your built-in responsive slideshow.
Static Banner Image
1. Before dragging your image to the RW Resources area, we recommend you rename the image “banner.jpg”
2. Open your page inspector and locate the Banner Area.
3. Simply select the following options: Static Image or 3rd Party Plugin (Static Image Enabled)
4. Copy and paste the following code into your sidebar area with the name of the image you have dropped into your Resources area. Example: The page will display banner_1.jpg
<div id="fs"><img src="%resource(banner.jpg)%" alt="My Image"/></div> 5. Preview your page and enjoy your responsive banner image.
Headings Span Colors
1. Add a span tag to your heading title
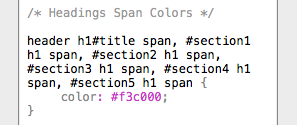
Headings Span <span>Colors</span>2. Open your page inspector. Insert the following snippet in your custom CSS area. (Figure 2)
/* Headings Span Colors */
header h1#title span, #section1 h1 span, #section2 h1 span, #section3 h1 span, #section4 h1 span, #section5 h1 span { color: #f3c000; }Figure 1:
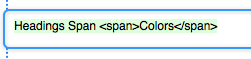
Figure 2:
Social Icons
2. Copy and paste the following code into your page's sidebar:
<div id="myExtraContent20”>
<div id="socialIcons">
<div>
    <a href="#" class="zocial icon googleplus flat"></a>
    <a href="#" class="zocial icon twitter flat"></a>
    <a href="#" class="zocial icon soundcloud flat"></a>
    <a href="#" class="zocial icon facebook flat"></a>
    <a href="#" class="zocial icon pinterest flat"></a>
    <a href="#" class="zocial icon vimeo flat"></a>
    <a href="#" class="zocial icon linkedin flat"></a>
</div>
</div>
</div><!-- #myExtraContent -->
3. Replace the # with the page url your social icon is associated. For example, if you would like your twitter icon to link to your own twitter page, the code snippet would look like the following:
<a href="http://twitter.com/bltthemes" class="zocial icon twitter flat"></a>4. Highlight your inputted code and click on Format and continue to enable the option "Ignore Formatting."
5. Preview your page and enjoy built in social icons. * For a full list of social icons, visit the index at Dexterity - Social Icons Tutorial
Let’s Get Started
Do You Enjoy Euphonic?
Help us spread the word and let the community know with a like and/or comment.
Make Euphonic Your Own
If you have any questions or feedback on style options and more, feel free to contact us. We’d love to help.